There’s more than one way to peel an orange. There are also various ways to install gadgets into your Tesla. Here is one way to install our rear camera washer set. This is based on a Tesla Model Y 2023 from Berlin factory. Tesla keeps tinkering with details all the time so this might not represent your car 100%, keep that creativity flowing.
An experienced person can do this in about 2 hours. If you haven’t worked with interior trim removal it might take you a bit longer.
Once done you should end up with quite a discrete solution where not much change is visible (see final images in the end of this guide).
If you are feeling unsure- leave the work to a good local garage (like bilkomponenter.no in Norway).
Package contents
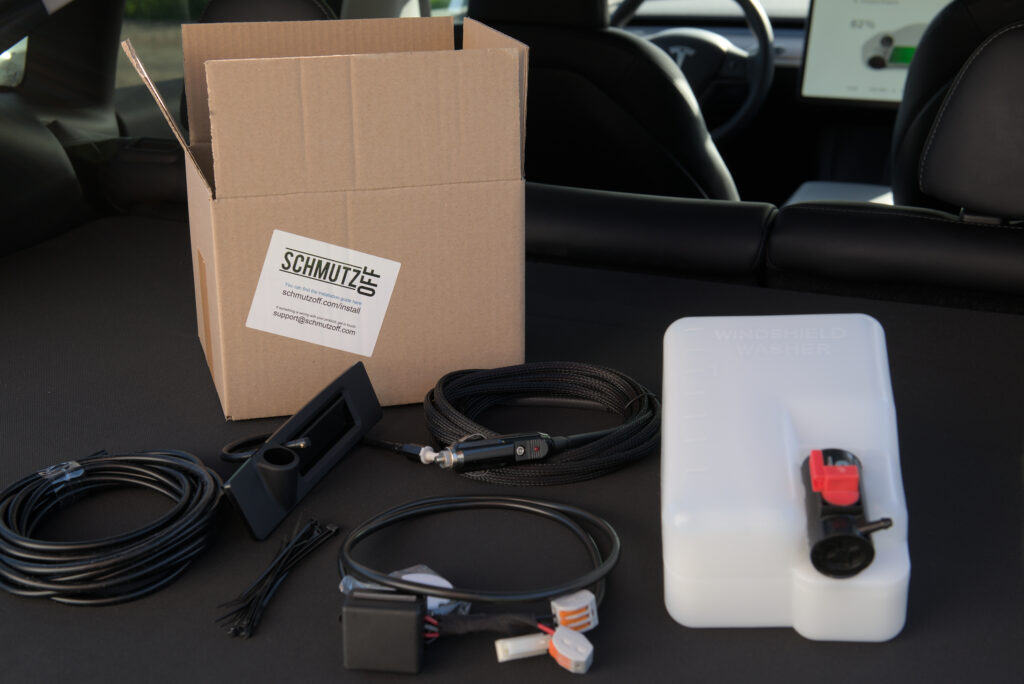
The package includes:
- 1.5 liter washer fluid holder with pump
- rear door handle with pre-installed spray head and valve
- ca 5 meters hose
- ca 4 meters cable with 12V plug
- wiring harness with remote relay
- remote button
- zip ties
What you need
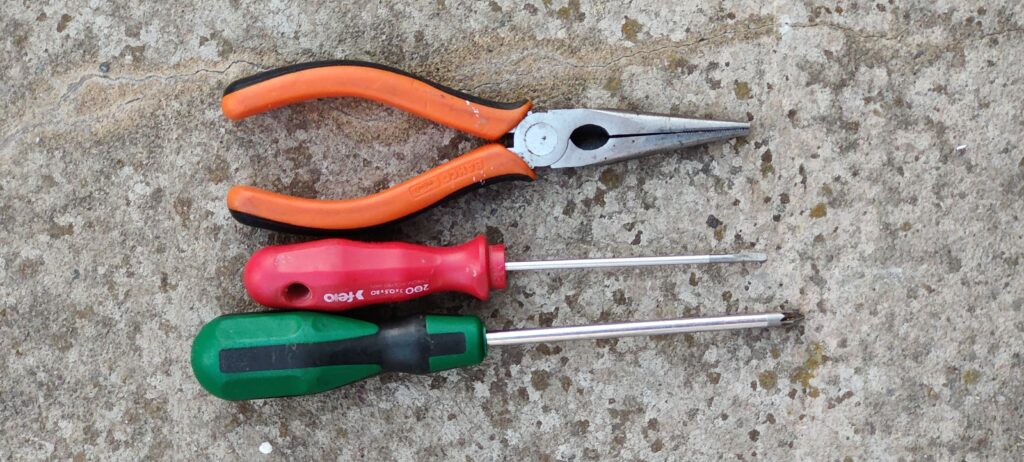
To get this done you need 3 basic tools: pliers, flathead and a phillips screwdriver.
Having a cable push/puller (like this one from amazon) will likely make your life easier when installing the hose.
Preparations
Disable anything that uses cameras
Disable sentry mode and auto pilots/self driving. Turning these off will make sure software does not get confused once you unplug the rear view camera. Disconnecting the camera while it is in use causes it to black out.
Remove trunk interior parts so you are able to see the bottom frame of the car.
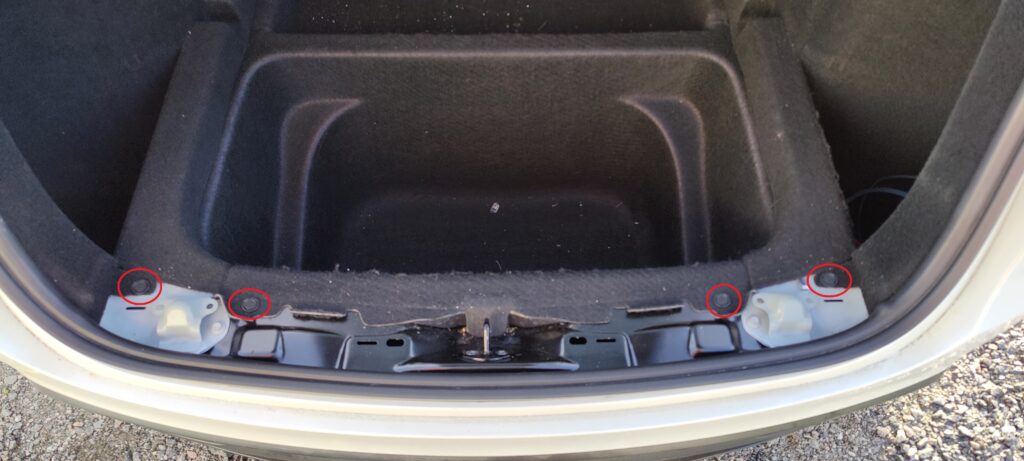
Start by pulling off the load guard. It just comes straight out. You are left with 4 pins that are holding the mats in place. Remove those (this is where the flat head screwdriver comes in, use it to pry out the internal part of the pin).
Now you can pull off the sides. They come right off, nothing special holding them. This exposes 2 more plugs.
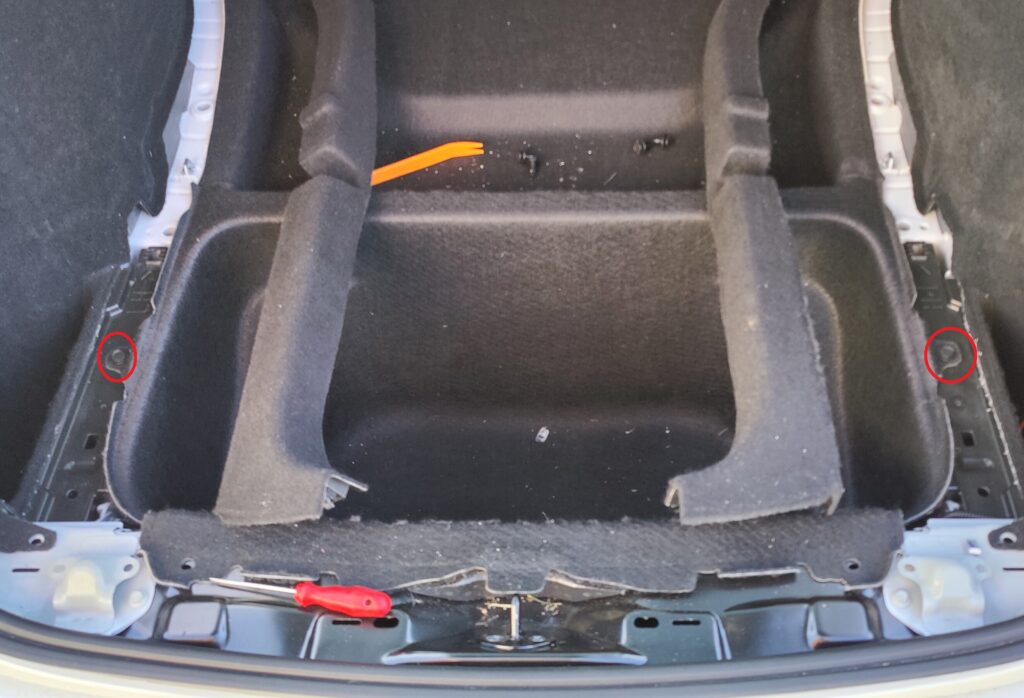
Now you will be able to remove the floor lining of the trunk. Should just come right out. It is in two parts, (velcro holding them together), so no need to rip the whole thing out, just the part closest to you.
Remove the side pocket linings by pulling them out.
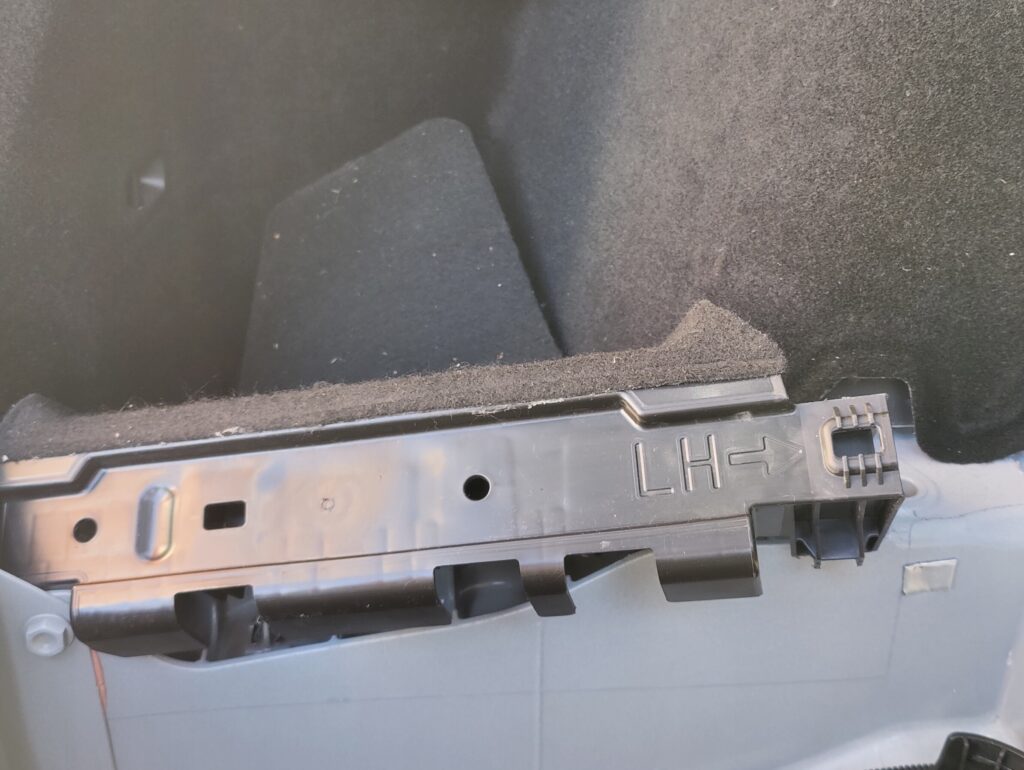
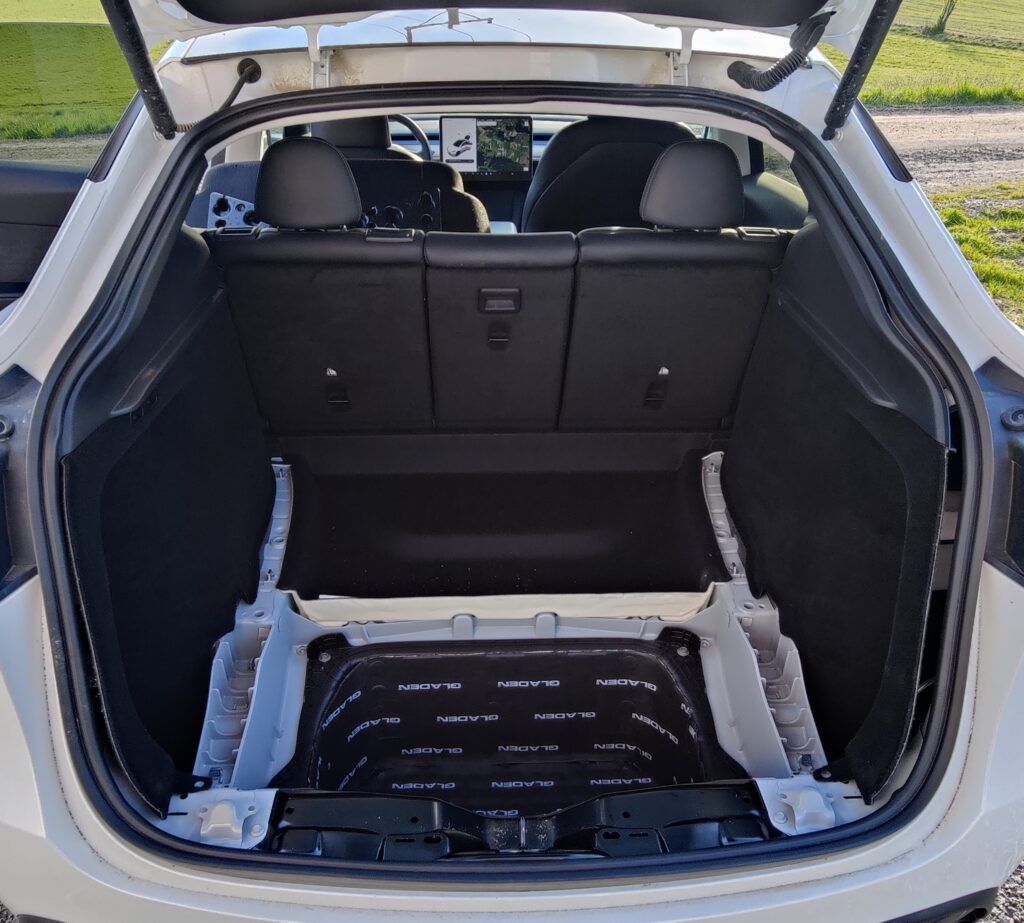
Undo the seal on the bottom left side and on the right side all the way up to the roof lining and you should end up with something like this (note, this car has extra sound deadening installed, that is all the black stuff glued to the frame, yours might be just white paint):
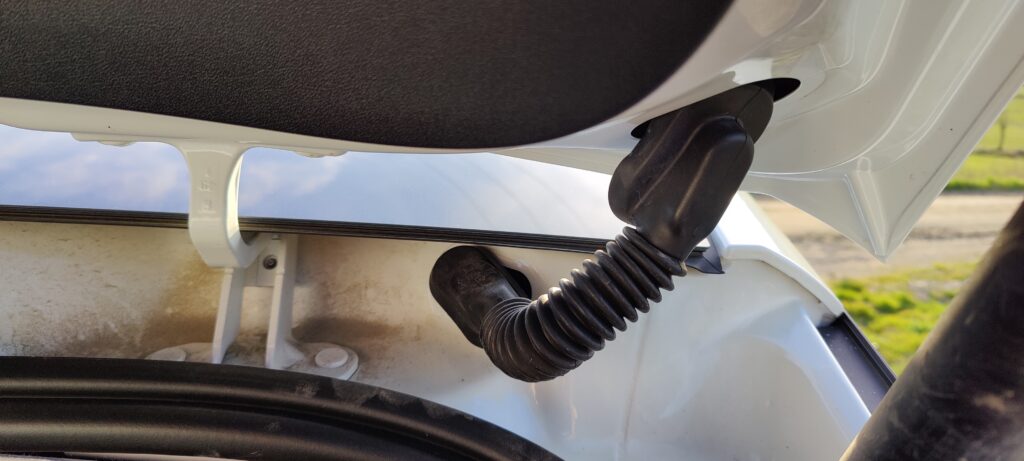
Remove the wire seal between body and trunk door. Simply squeezing it will allow you to remove it. It pops right out.
Remove trunk door interior panels. First pull down the one closest to the hinges. It is a bit slippery due to shape, but a firm pull does the job. It is held in place with these white plastic bits that tend to fall off.
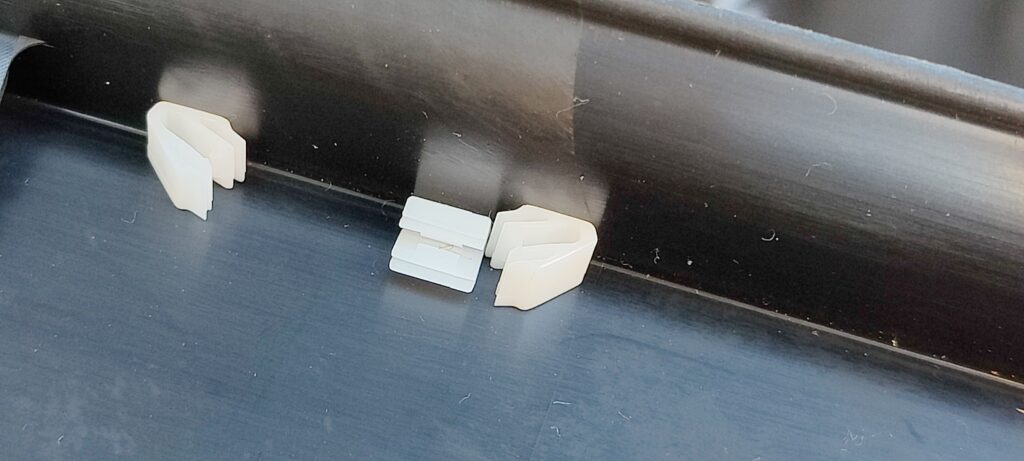
Make sure you find all the loose ones and put them back in their place so there is no rattle after your installation.
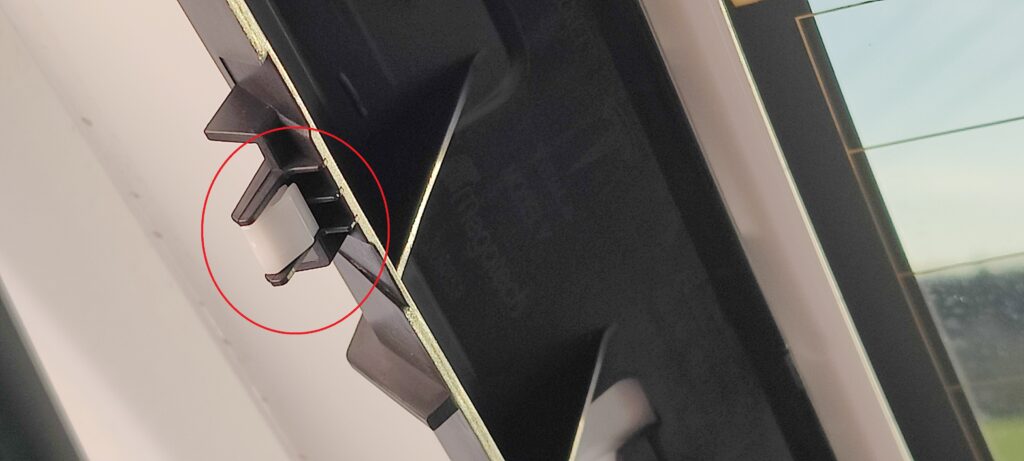
This should have exposed two final plugs, one at each side.
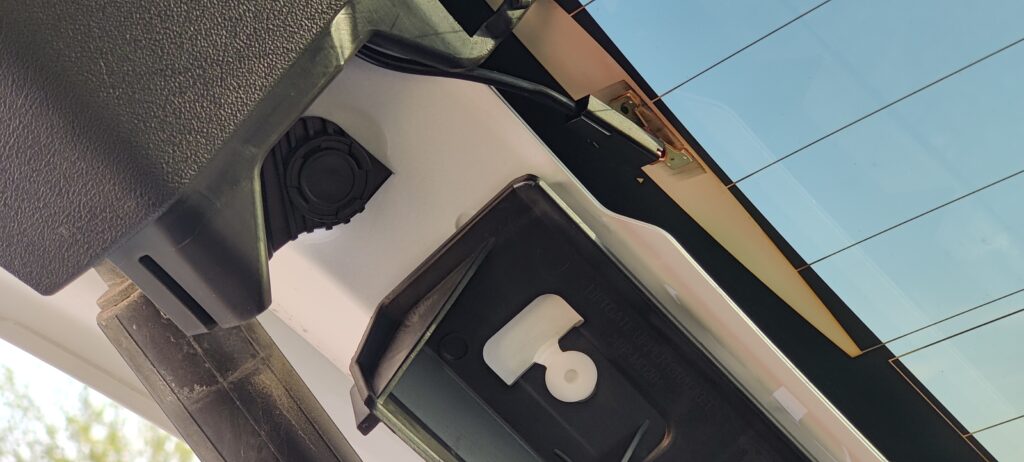
After these are removed you will be able to pull off the remaining trim. Be careful not to drop it, there is a wire connected to it. A simple connector.
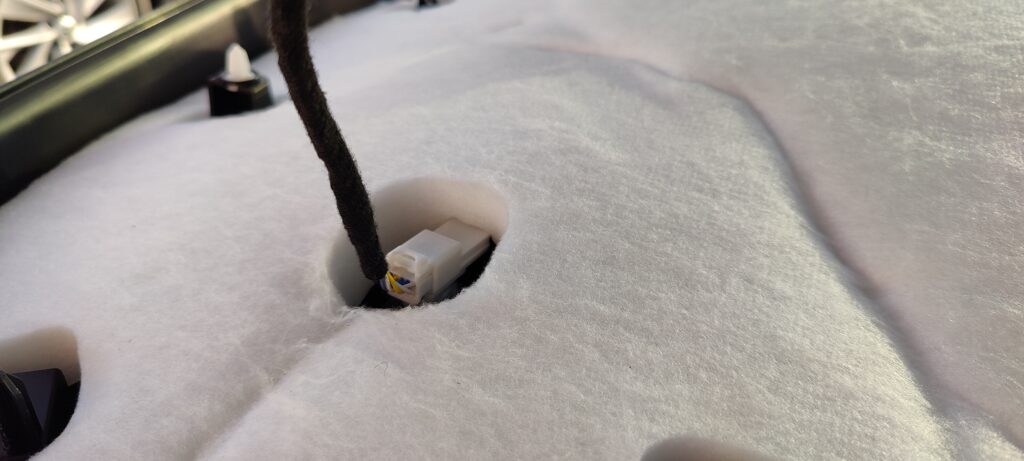
Remove the handle
First unplug the release button wire connector by pulling the gray lock pin up.
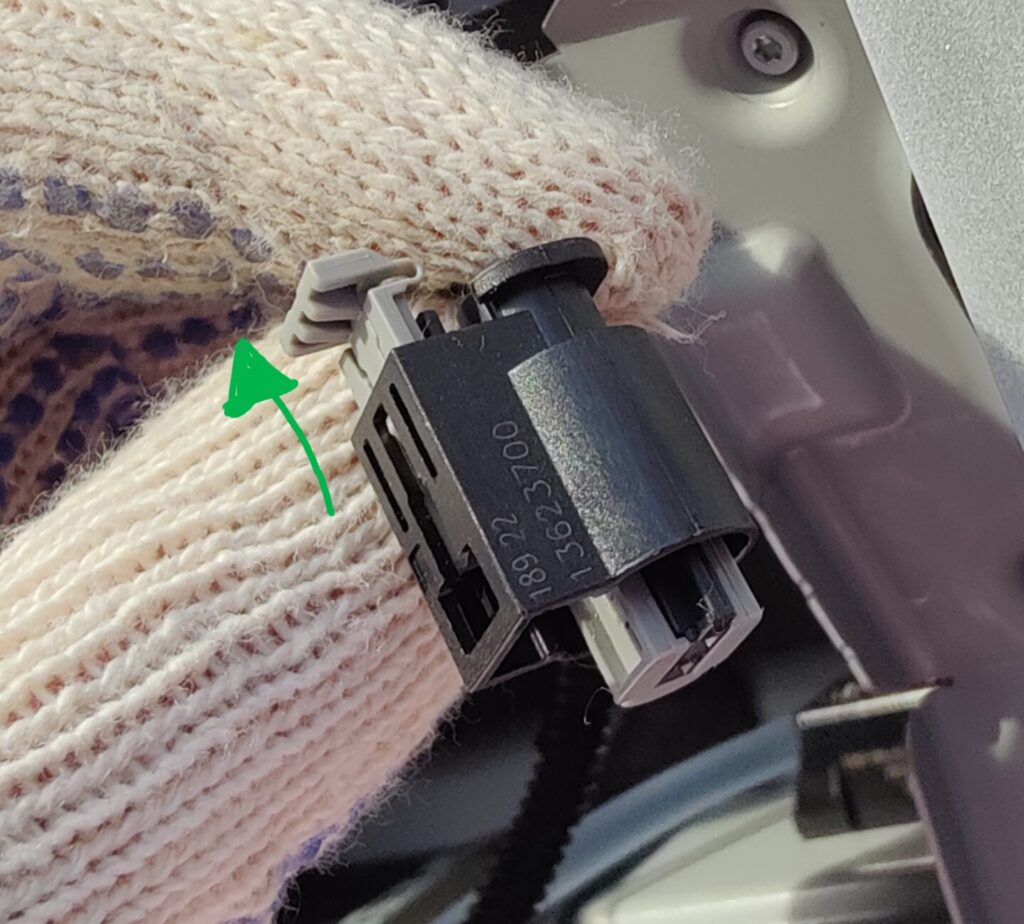
Now you can disconnect the camera. This connector is a bit stubborn. First you will need to pull the lock pin out a few millimeters, then you will be able to press down on the lock itself (circled in the photo below) and pull off the connector. Do not try to rip it out, it will come off easily once you’ve applied enough pressure to the lock. Too much pulling force will break the camera.
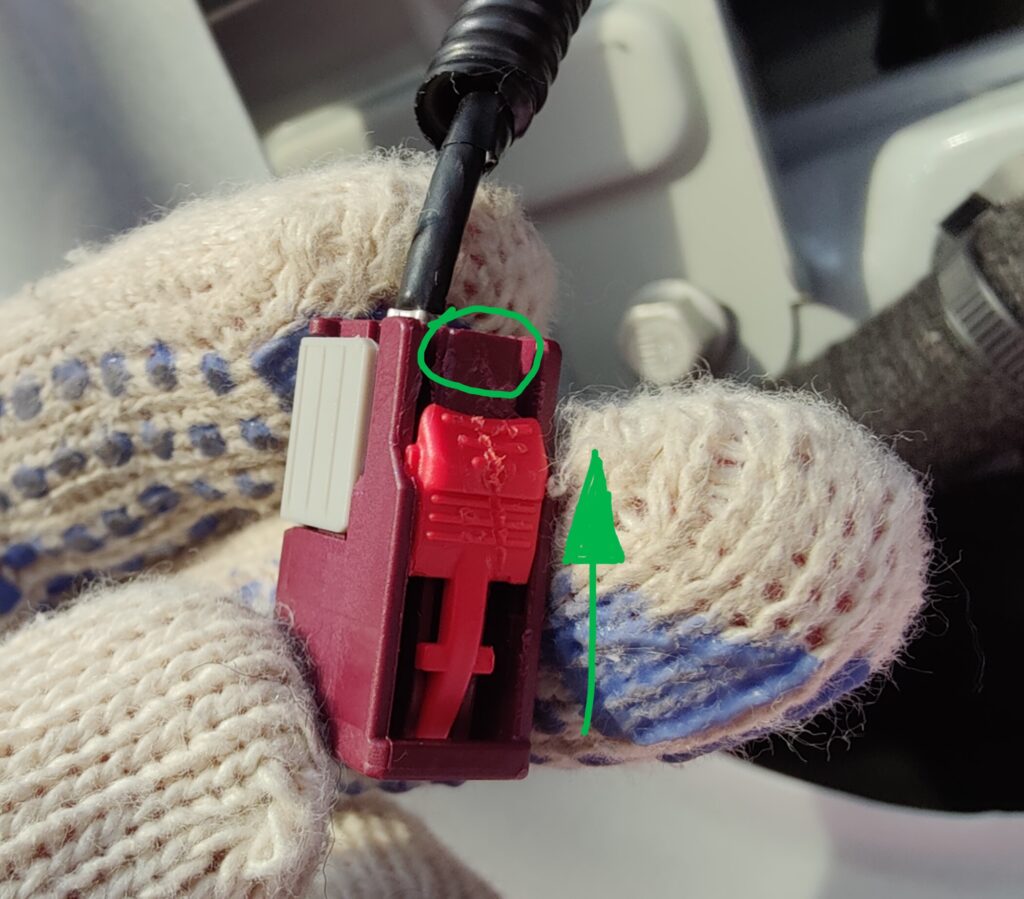
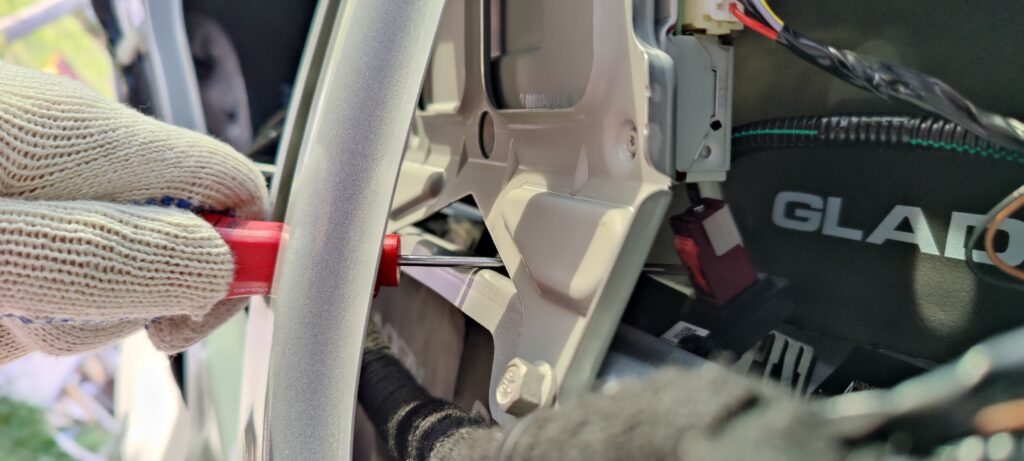
A little tip is to use the flathead screwdriver for moving the lock. There is just enough space in between the frame parts to get to it.
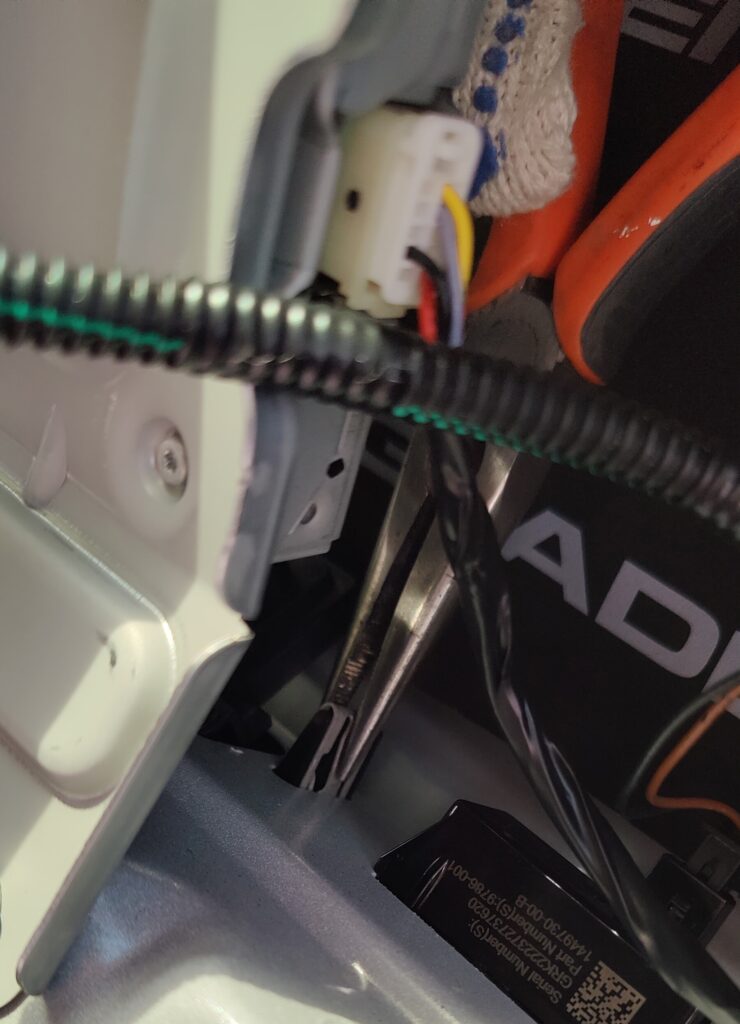
No more wires left, you can remove the trunk handle by using the pliers.
Using the phillips screwdriver remove the camera from the original handle and install it in the new one. It has a gasket around the lens and fits really tightly into the handle. You will have to push with some force to get it out.
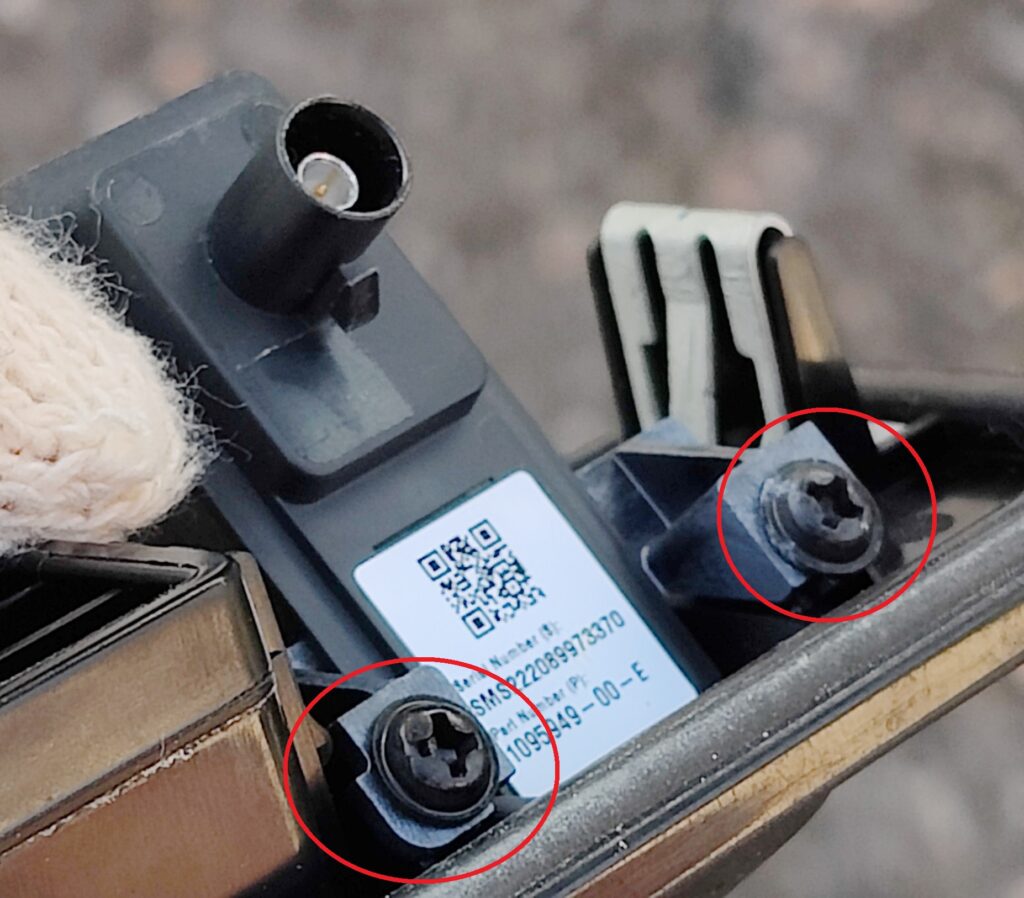
Remove the metal holders from the original handle and put them on the new one if they are not already installed.
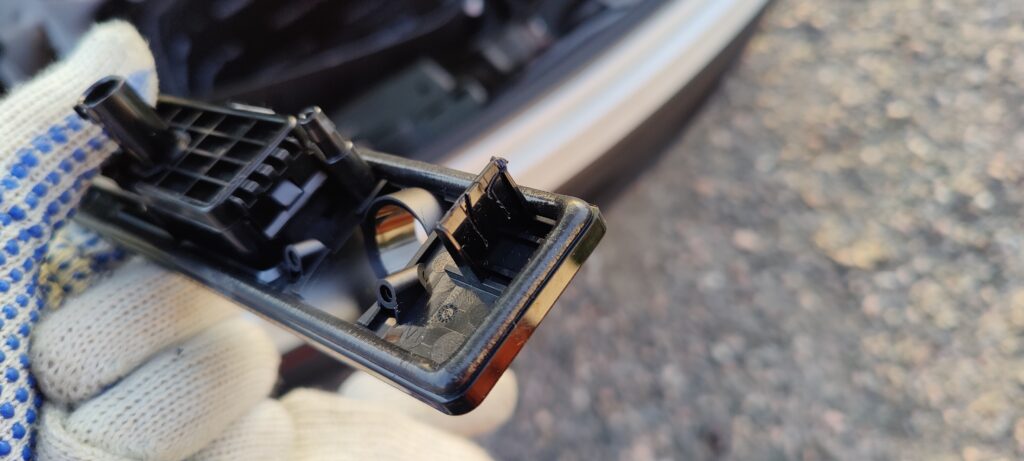
Installation
Now you should be able to install the new handle and reconnect both wires.
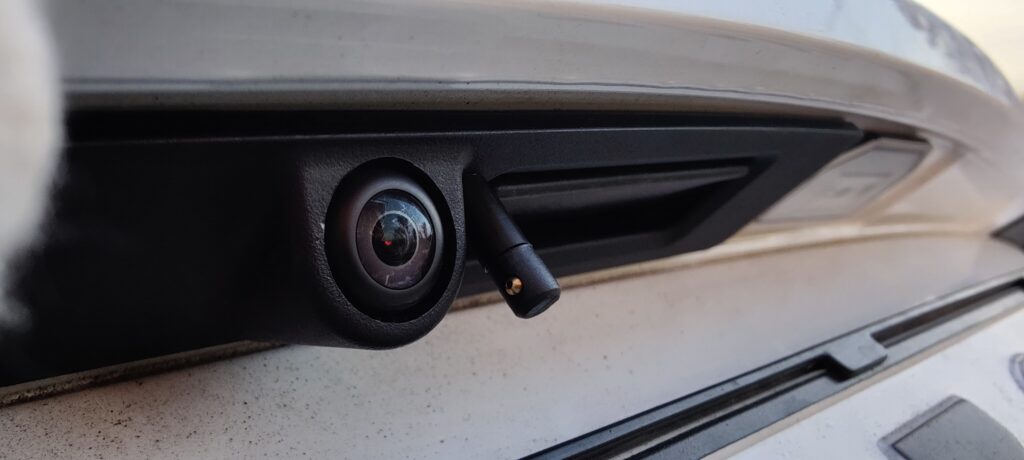
Don’t worry if the camera stops working after being disconnected. Double-check that you connected it correctly. If you still get a black screen, disable all functions requiring the camera (all auto pilots, self driving and sentry mode) and restart the car by holding both buttons on the steering wheel.
Customer @tobfr emailed that recalibrating the rear camera in the service menu resolved this issue for them.
Washer fluid hose
This is the “fun” (sarcasm alert) part of the installation. Start by getting it through the wire protection between the frame and the car body. Some lubricant and the push/pull kit mentioned above in the tool list will really save you time here.
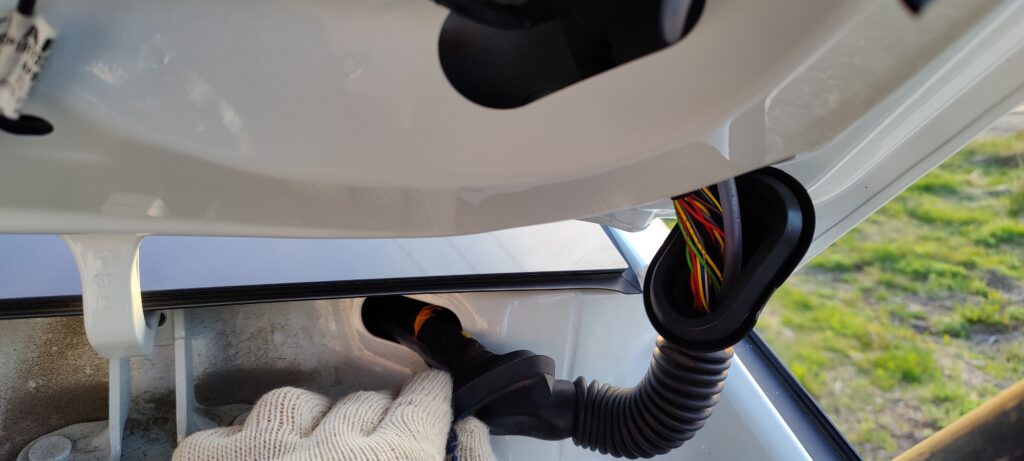
Now connect the hose to the valve which is already attached to the handle and use the zip ties to hold the hose in place. Do not over tighten, just enough force to keep it in place.
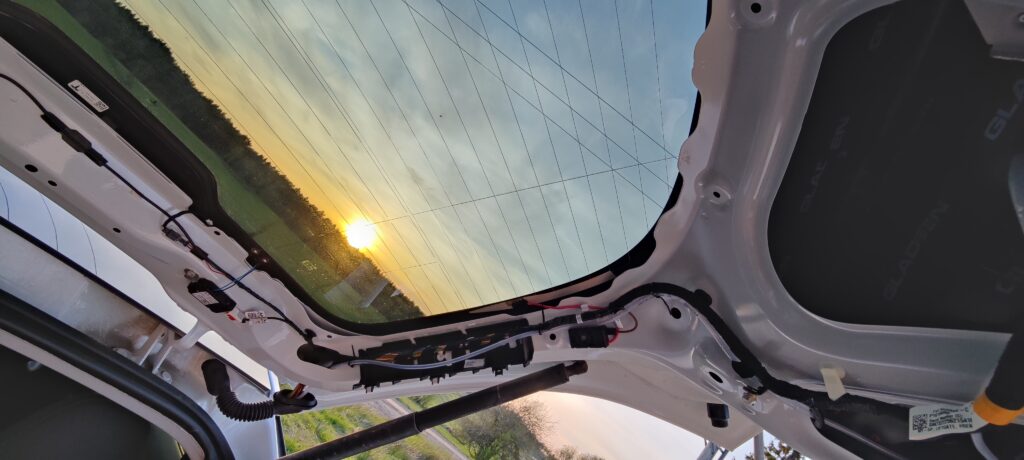
There is a hole in the frame of the car where you will be able to see the roof lining. Your job now is to get the hose through that hole and back out into the trunk.
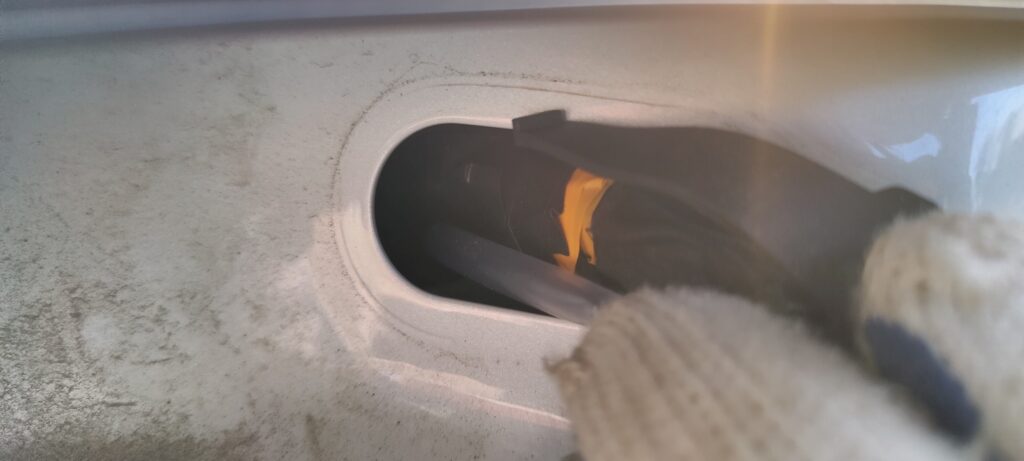
Once you get it back, run it down the opening between right side trim and the gasket. I used the opening for the cargo fastener as entry back into the interior of the car.
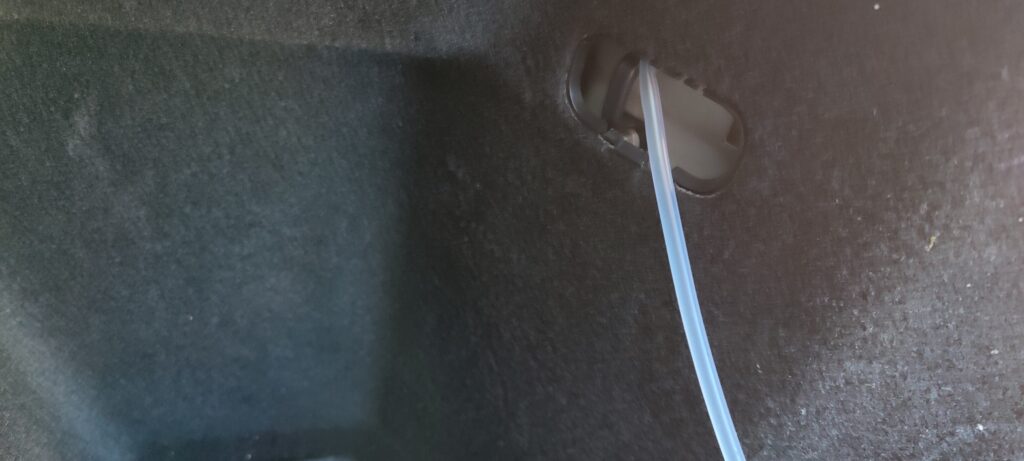
You are done with the hardest part! Congratulations!
Electrical wiring
On the left side there is another opening in the trim (just above the 12V outlet). Run the wire through that.
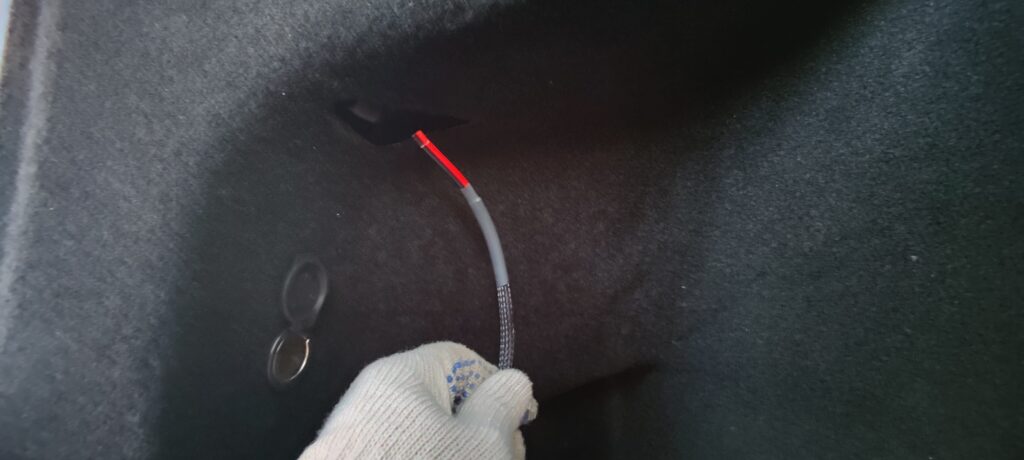
Lay the wire down around the plastic making sure it is not pressed in between any components. Adjust the cable when installing back the side pocket linings. There is just enough place for the cable to be loose. It should not get stuck between things.
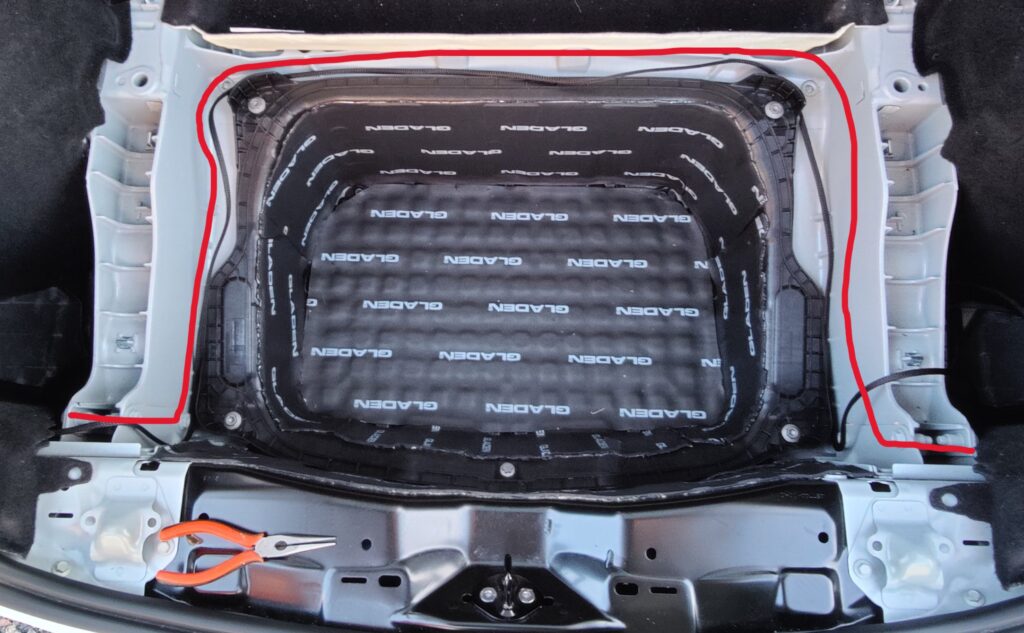
Remove 1cm of cable isolation and attach the power cable to the wire harness. Red cable with red ones, black with black ones.
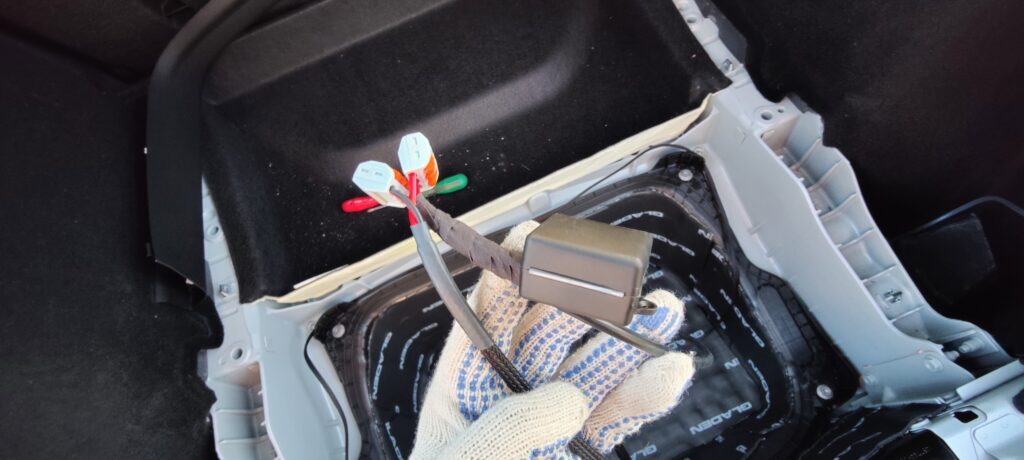
There is just enough space behind the interior trim on the right side to fit all of these wires.
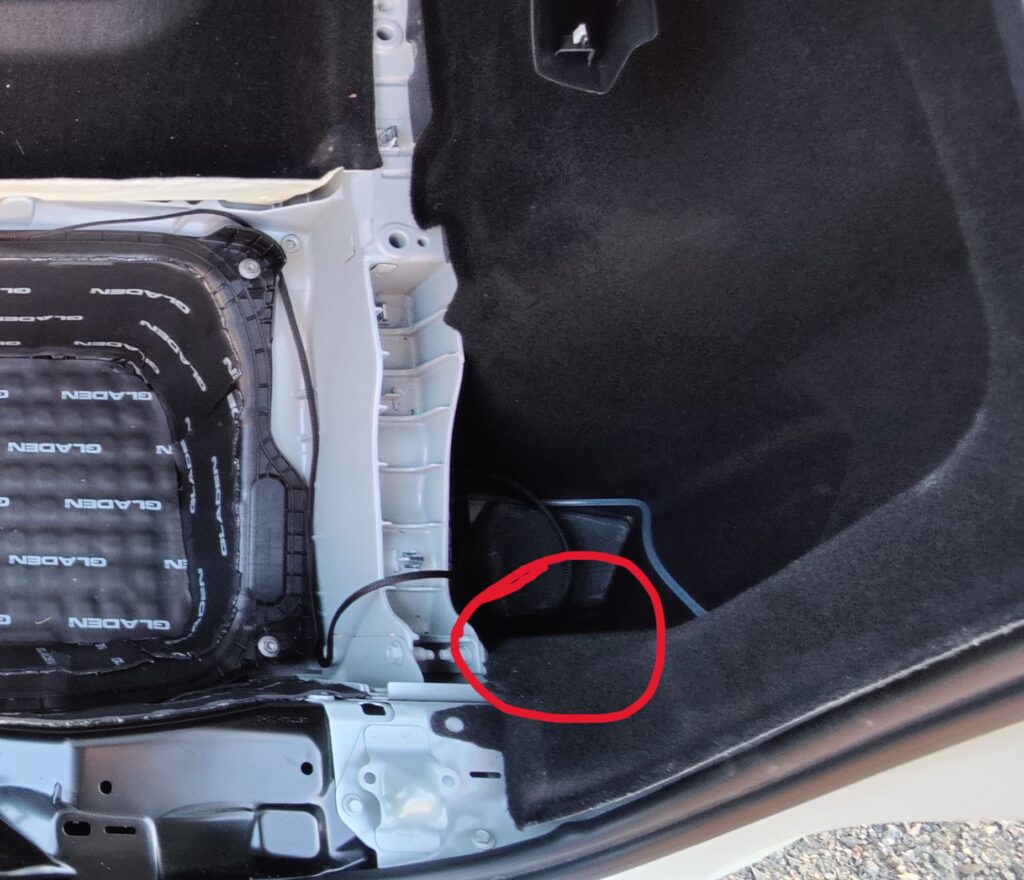
You should end up with a view similar to this:
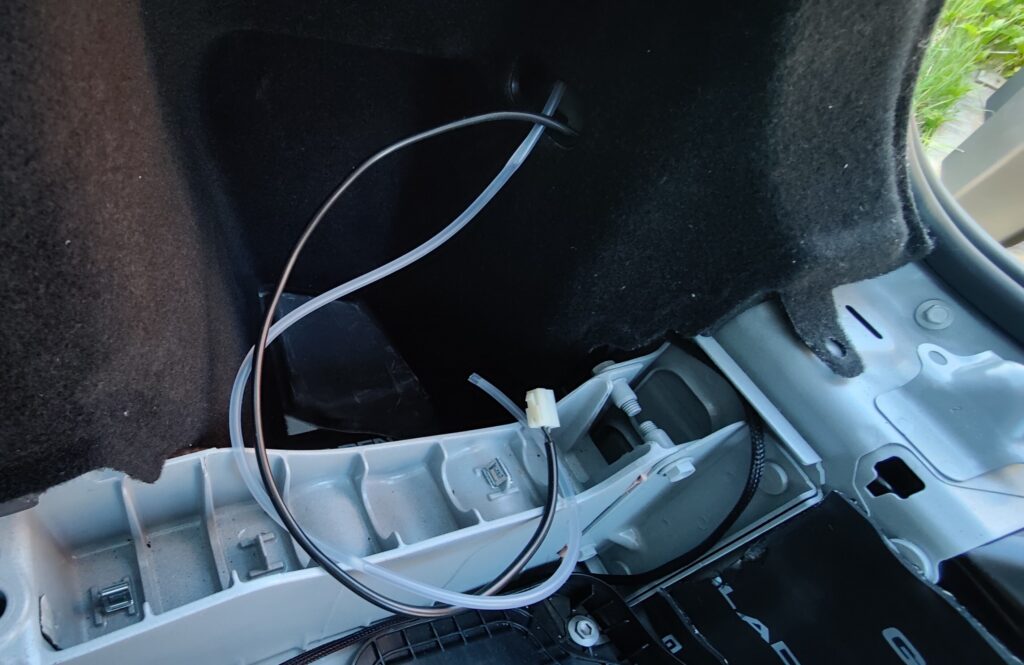
Now put all of the interior trim back together in reverse order. Connect the hose to pump outlet and the power wire to the pump connector. Tuck everything into the right side pocket and you are done with basic installation.
In my car I use this solution together with plastic pocket boxes. That way I have extra protection in case there is a leak. They also come with covers so nothing is visible when trunk is open (hose and wire is slightly clammed with the lid but I prefer that to cutting into the container.
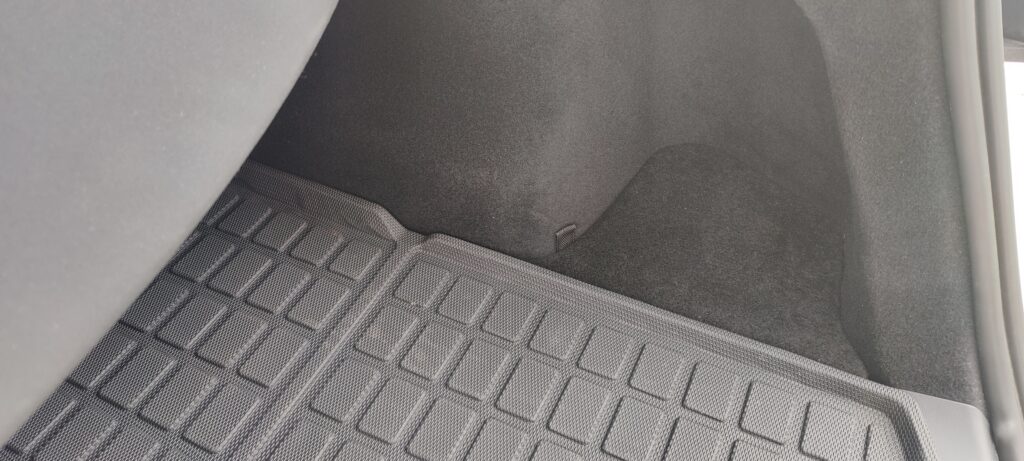
The fluid container has a holder that you could attach to the plastic basket. I chose to keep extra fluid beside the container so nothing moves around while driving and it just is more simple this way.
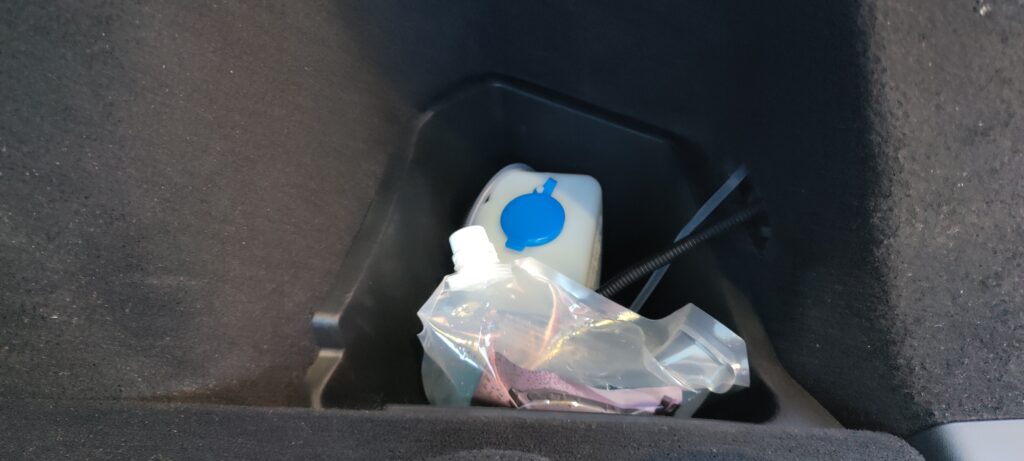
Another tip- the remaining hose/wire should be enough for you to take the container out of the trunk during refill. If you spill – it will go on the ground and not inside your trunk.
Remote button
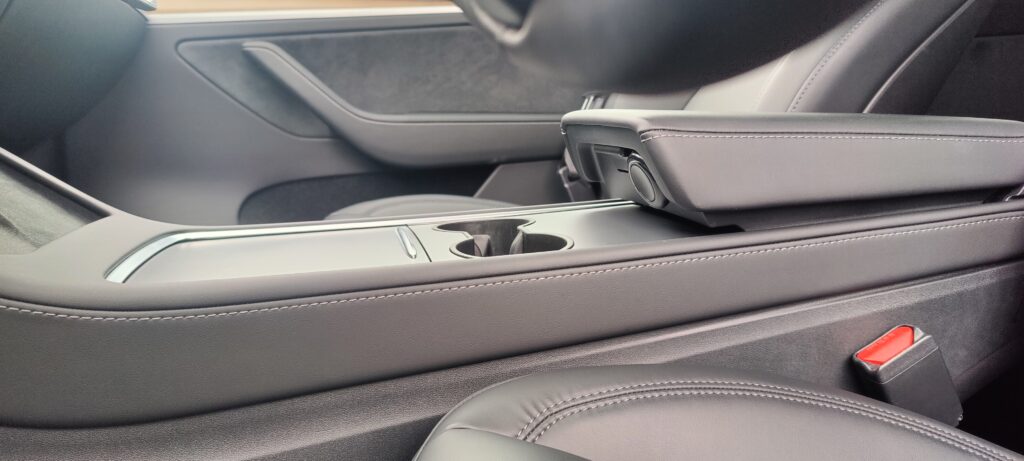
Up to you where you feel comfortable with yours. It comes with a double-sided sticker so you can put it anywhere you want.
I kept mine loose in the cup holder for a while. But now my favorite place is on the arm rest, right next to the opening lever. It is completely invisible and really handy. The button is quite big and its shape makes it really easy to find without looking.
Washer fluid
Since most of the time I use the rear camera washer is during winter, I only fill it up with winter washing fluid. That way I am sure it does not freeze on me. The few times it is needed during summer are no big deal. The extra chemicals clean more potently.
Model 3
Model 3 installation is very similar. With one caveat- there is no standard 12V outlet in the trunk. If you have one, the cable included in the kit should be enough to reach it. If not, please consult a reputable installer for where to find 12V in the rear of a Model 3 or check out this thread at teslamotorsclub.com.
Tiny fine print in the end
It is you or the installer who are fully responsible for the warranty void on your vehicle if any such is applicable after installation of this washer set.
However, keep in mind that if something does go wrong, you still have all of the original parts that allow you to do a full reset of the car before visiting the workshop. Just saying.
